
Do you want to learn how to create certificates for your LMS website? If so, this article is for you.
A great way to motivate learners and validate their progress on an eLearning website is by awarding certificates upon course completion.
Professional certificates add value to your courses and give learners a sense of accomplishment.
In this article, we’ll walk you through the process of creating and generating certificates for your LMS website.
So, without further delay, let’s jump right in!
Why Create Certificates for LMS Websites?
Certificates hold significant value in any online course or training program facilitated through an LMS website. They provide validation for the learner and serve as motivation to complete the course.
Creating a certificate that resonates with your brand and provides a unique, concrete connection is crucial.
Integrating your brand’s visual elements, such as logos, colors, and slogans, confers a distinctive charm to the certificate, making it uniquely yours!
In the certificate creation process, a balance must be struck between aesthetic design, relevant content, and alignment with your brand’s aesthetic.
The goal is to honor students’ achievements while also subtly promoting your brand through the certificate design and functionality.
Some of the top benefits of course certification include:
- Motivate Learners: Certificates give learners a goal to work towards and encourage course completion.
- Credential Verification: Certificates provide a formal way for learners to prove that they have successfully completed a course. It can be useful for job applications, promotions, or other professional opportunities.
- Learners can Showcase Skills and Training: Earning certificates gives learners a way to demonstrate and communicate the skills, knowledge, and training they have acquired to others.
- Enhance Brand Visibility: Branded certificates display and promote your brand or school’s brand when learners share them on resumes, social media, etc.
Some of the Best LMS WordPress Plugins for Creating Certificates
When using WordPress to run a Learning Management System (LMS) website, several outstanding plugins are available that make creating and sharing completion certificates a breeze.
Let’s explore some of the best options available:
1. Masteriyo
Masteriyo is a top-notch plugin for creating and issuing certificates on your WordPress website. Its powerful certificate management capabilities make it a top contender among LMS plugins.
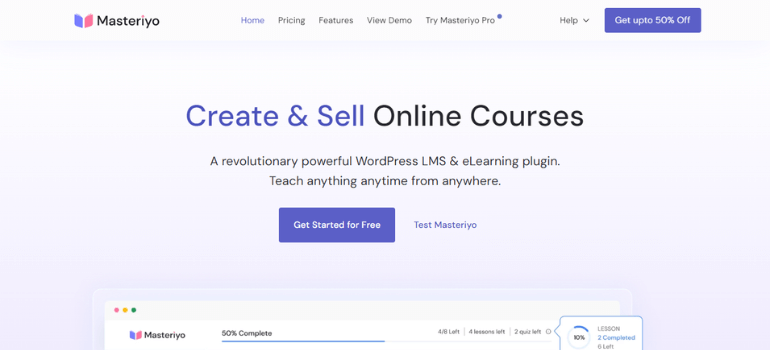
Masteriyo has built-in support for generating certificates when a learner completes a course or achieves a milestone.
Moreover, you can easily customize the template of your certificates using Masteriyo’s drag-and-drop builder to add your brand value or even create one from scratch.
Masteriyo also provides flexibility in how certificates are delivered. Learners can download their certificates directly from their dashboards for on-demand access.
2. LearnDash
LearnDash is one of the most popular premium LMS plugins for WordPress.
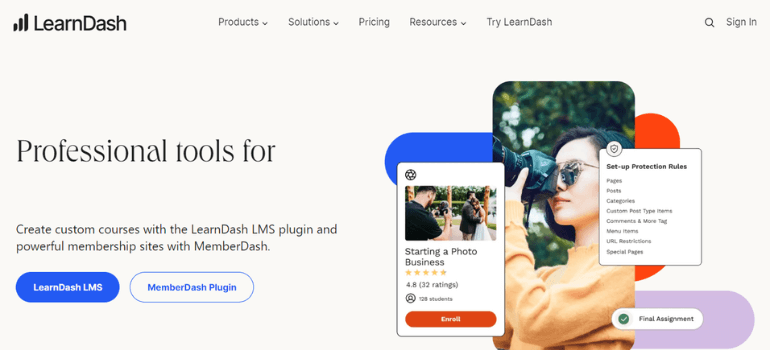
Its companion Certificates add-on allows you to create unlimited certificate templates and automatically issue them to students.
LearnDash enables you to modify colors, fonts, layouts, and branding elements using an intuitive drag-and-drop certificate builder.
You can create templates that align with your brand image. Completed certificates can be downloaded, printed, shared on social media, or attached to emails.
3. TutorLMS
TutorLMS is a versatile LMS plugin for WordPress. Its user-friendly drag-and-drop course builder makes it easy for instructors to create beautiful online courses.
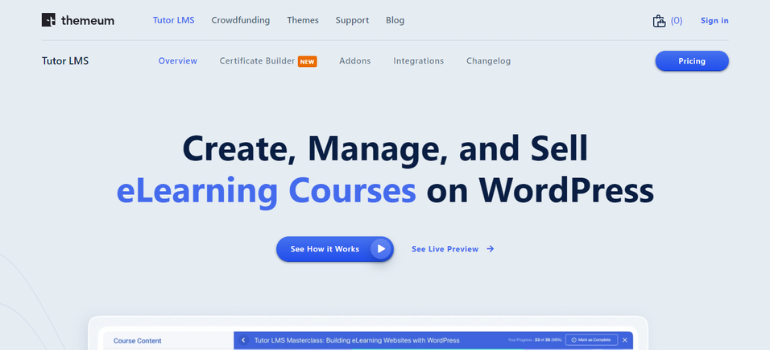
With its built-in certificate feature, instructors can quickly design custom course completion certificates right within TutorLMS.
Also, you can upload backgrounds, add text, upload logos, and fully brand your certificates.
After assigning a certificate template to a course, TutorLMS automatically issues certificates to students who complete all lessons and pass quizzes.
This creates a smooth, automated certificate generation process.
4. LifterLMS
LifterLMS delivers powerful certificate creation tools that make it easy for administrators to design, automate, and award completion certificates.
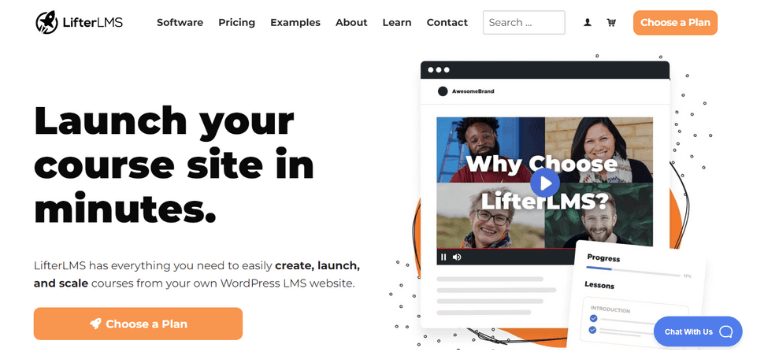
The plugin’s certificate builder provides pre-made templates and allows for full customization of fonts, colors, layouts, branding assets, and more.
Moreover, it enables control over certificate delivery and visibility.
Completed certificates can be downloaded from the user dashboard, attached to emails, shared via social media, or displayed publicly.
Overall, LifterLMS stands out for its intuitive certificate creator, automation features, custom branding capabilities, flexible delivery options, and detailed reporting.
How to Create Certificates for Your LMS Website? (Step-by-Step)
Among the powerful plugins listed above, Masteriyo is the top pick we recommend to users. Thus, let’s dive into the process of creating a certificate using Masteriyo.
Step 1: Purchase Masteriyo Pro Version
Masteriyo has an exciting certificate builder add-on that helps create customized certificates for students to give.
Notably, this premium add-on is exclusively available on our Masteriyo pricing page.
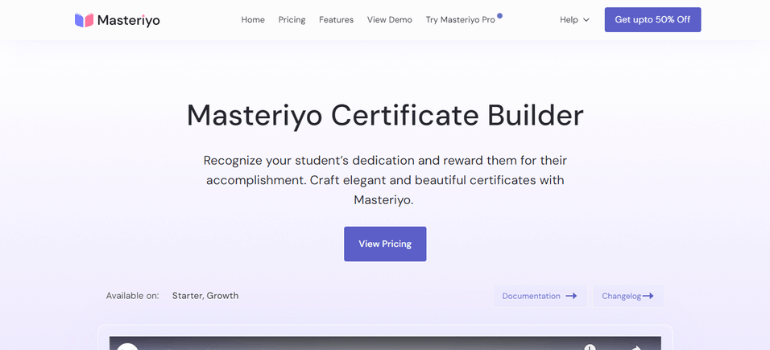
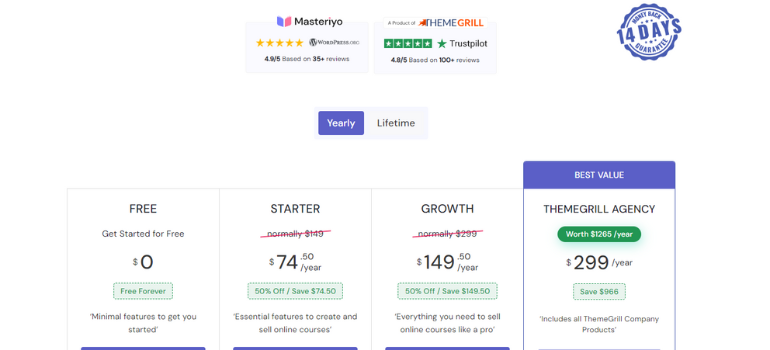
Thus, your first move involves navigating to the official plugin webpage to select and purchase a plan that aligns with your requirements.
Upon purchasing the suitable plan for your website, you will receive an email containing a download link and a license key.
Next, click the “Download Masteriyo Pro” button. This action will take you to the order page.
Here, a collection of zip files of the plugin will be available for download, with the earliest version listed first and the latest to the last.
Ensure to download the most recent version by clicking the “Download” button, and remember to copy the license key.
Step 2: Install and Activate Masteriyo LMS
Begin the Installation:
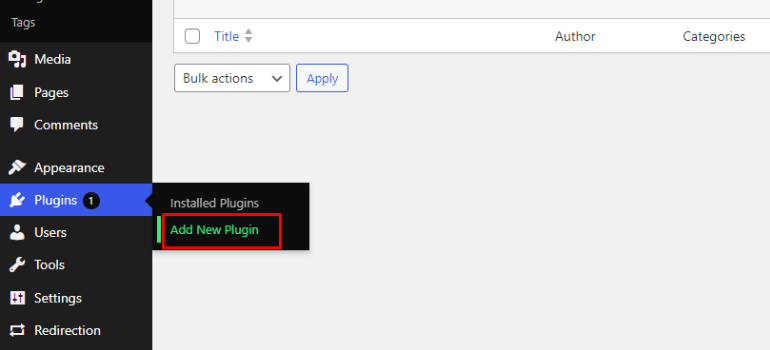
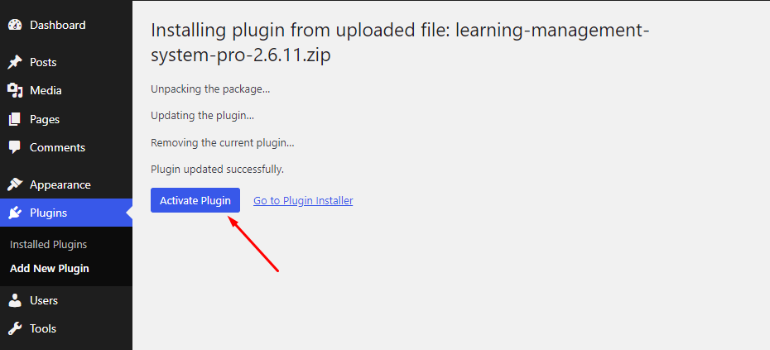
Navigate to Plugins >> Add New Plugin within your dashboard and select the Upload Plugin option.
Upload the Plugin:
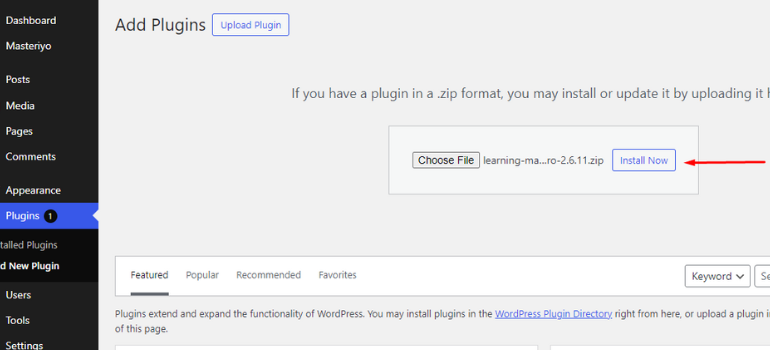
Click on Choose File and locate the most recent Masteriyo zip file you’ve saved. Following that, select the Install Now button.
Activate the Plugin:
Upon successful installation, opt for Activate Plugin to initiate its functionality.
Configure the Setup Wizard:
After the plugin activation, you’ll be directed to a configuration wizard page where you can configure the plugin’s preferences.
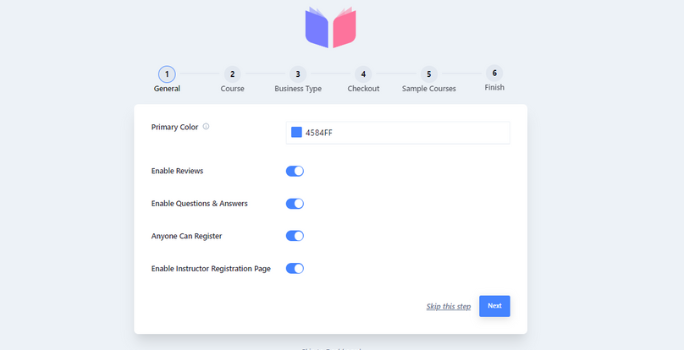
Effectively configure Masteriyo LMS by proceeding from this point. You can check our docs page on Masteriyo’s official site for further information on the setup wizard.
License Activation:
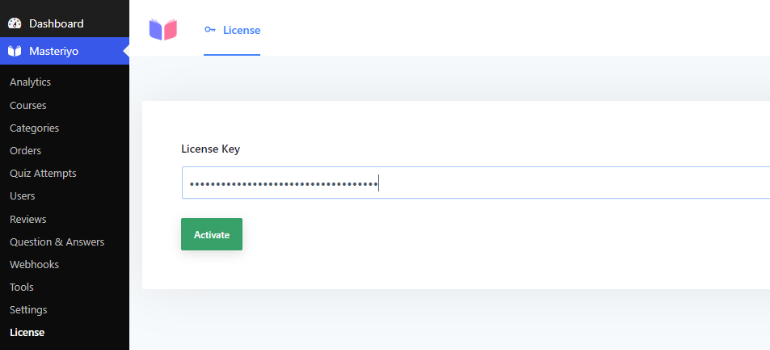
Now, revisit your dashboard and navigate to Masteriyo >> License. Subsequently, insert the previously copied license key and click the Activate button.
Congratulations! Masteriyo Pro has been effectively installed and activated on your website.
Step 3: Enable the Certificate Builder Addon
Upon activating Masteriyo Pro, the Certificate Builder addon can now be conveniently enabled directly from your dashboard.
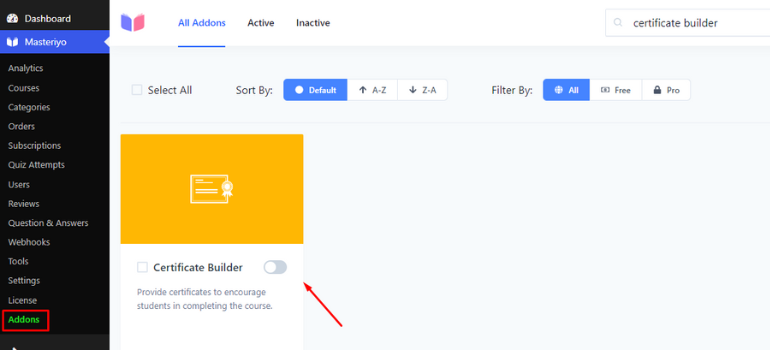
To do this, proceed to Masteriyo >> Addons within your dashboard.
Subsequently, locate the Certificate Builder add-on and click on the activation toggle to enable it.
Step 4: Create Courses, Lessons, and Quizzes
Before generating a certificate, it’s essential first to establish a course and accomplish some milestones.
A distinct advantage of utilizing Masteriyo is its capability to allow the creation of unlimited courses.
Additionally, it offers a unique single-page interface for easy course creation.
Create Your First Course
So, let’s embark on the course creation journey:
Navigate to Masteriyo, then select Courses.
Subsequently, click on the “Add New Course” button.
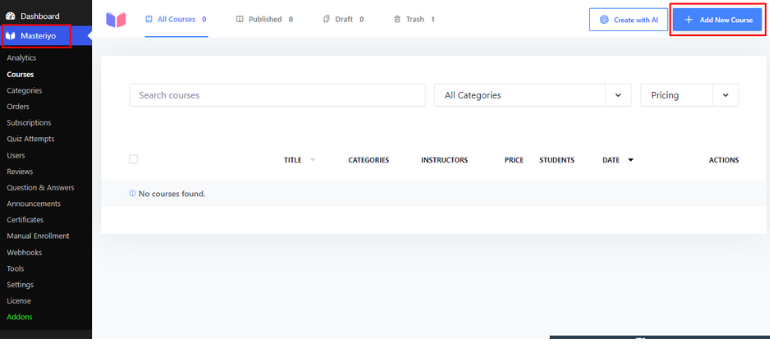
Notably, with Masteriyo’s latest feature – the integration of “OpenAI ChatGPT” – course creation becomes a breeze!
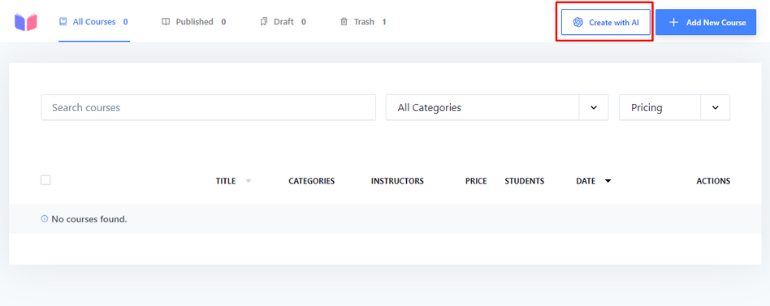
Just input the titles, and you can formulate courses in mere minutes. Masteriyo now simplifies course creation to an unparalleled degree.
After completing that step, you will be directed to the “Add New Course” page under the Course tab.
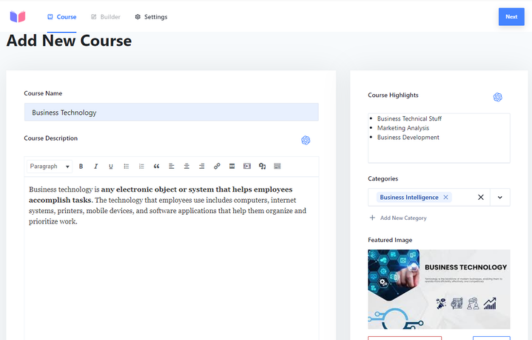
On this page, you can input a Course Name, Description, and Highlights, select Categories, upload a Featured Image, and insert a Featured Video.
Once all details are provided, click on the “Next” button.
This will navigate you to the Course Builder tab, where you can “Add New Section” to your content.
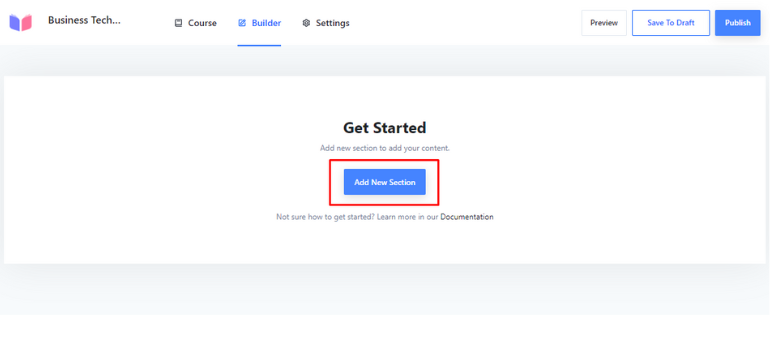
Next, select “Add New Content,” which will enable you to create new lessons and quizzes.
Creating a New Lesson
Click on “Add New Lesson” enables you to create a fresh lesson for your LMS.
Similarly, you can add a Lesson Name, Lesson Description, Featured Image, and even videos from various sources (YouTube, Vimeo, and Self-hosted).

Once finished, you can enable the preview option to check the formatting and content or publish it directly.
Add New Quiz
Select “Add New Quiz” from the menu to open the quiz builder.
On the Info tab, give the quiz a descriptive name.
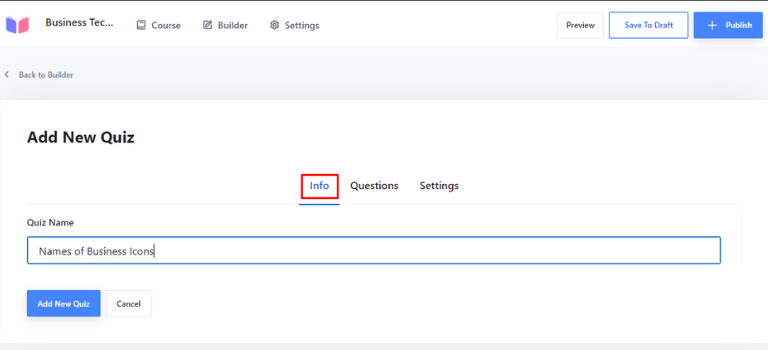
Likewise, the Question tab allows you to add new questions to the quiz.
Specify the question name and select a question type (e.g., True/False, Single Choice, Multiple Choice, Match the Following, etc.)
Further, manually insert potential answers for question types like Single- and Multiple-Choice. Make sure to mark the correct answer.

Likewise, the Question tab allows you to add new questions to the quiz.
Specify the question name and select a question type (e.g., True/False, Single Choice, Multiple Choice, Match the Following, etc.)
Further, for question types like Single Choice and Multiple Choice, manually insert potential answers. Make sure to mark the correct answer.
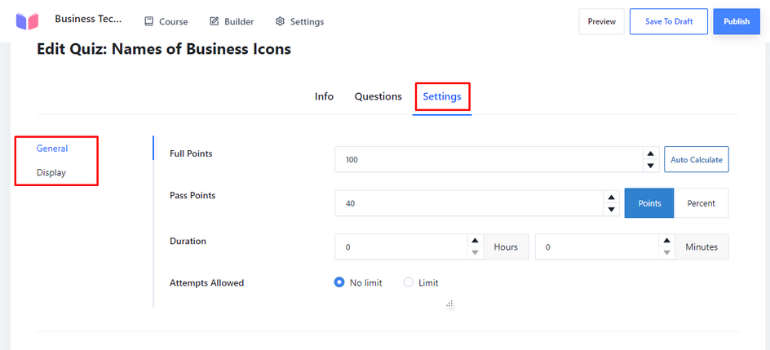
You can determine the Questions Per Page and choose to randomize questions from the Display option.
Once done. Click on Update.
Then, preview the quiz and click “Publish” to make it live or “Save Draft” to work on it later.
Step 5: Create a Certificate
After activating the Certificates addon, go to the Certificates menu in the dashboard.
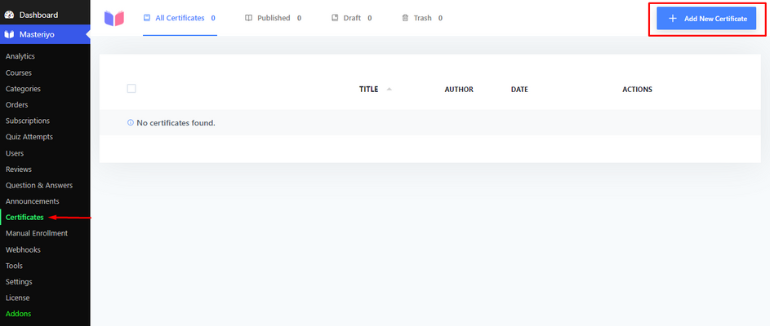
Click “Add New Certificate” to start designing a new certificate. You can choose either “Blank Slate” or any template that you like.
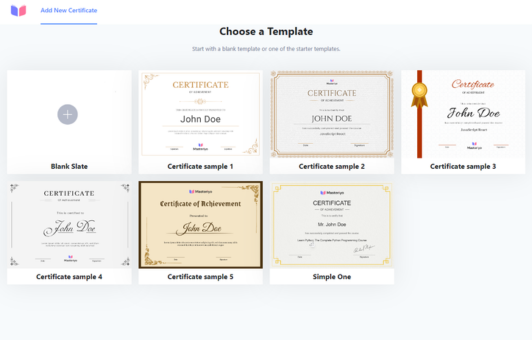
The pre-built certificate template is highly customizable. The best part is you can use three certificate building blocks, Course Title, Student’s Name, and Course Completion Date, to pull the corresponding data for the course and student automatically.
You can also easily customize the blocks as per your needs.
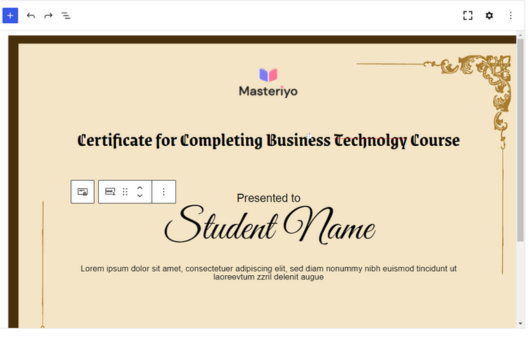
For a blank slate, you can upload a background image from the media library. After that, you can add the certificate building blocks and customize them to match your LMS site’s branding.
Once done, publish the certificate or save it as a draft to work on later.
Manage Course Certificates
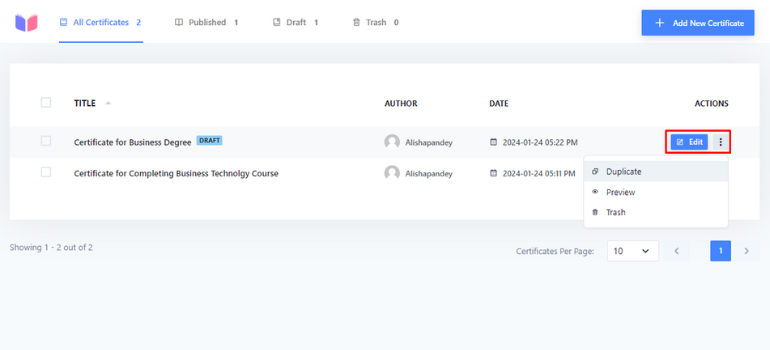
One of the perks of using Masteriyo is that it not only lets you create stunning certificates but also enables you to manage all your certificates from one place.
To do this, you can go to the Certificate tab and edit, duplicate, preview, or delete the certificates as necessary.
Integrate Certificate into your Course
After creating a certificate, go to the course you want to attach it to.
Open the Course Settings and go to the Certificates tab.
Toggle the switch to enable certificates for this course.
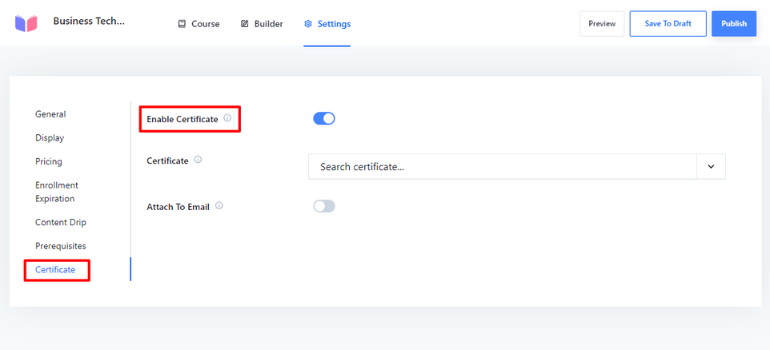
Select the certificate template or custom certificate to use in the drop-down menu.
The certificate you designed earlier should be available for selection here.

Choose the certificate you want to issue to complete this course.
Click the “Update” button to save the certificate selection.
Issuing Certificates to Students
When a student completes all the course requirements and lessons, a “Download Certificate” option becomes available.
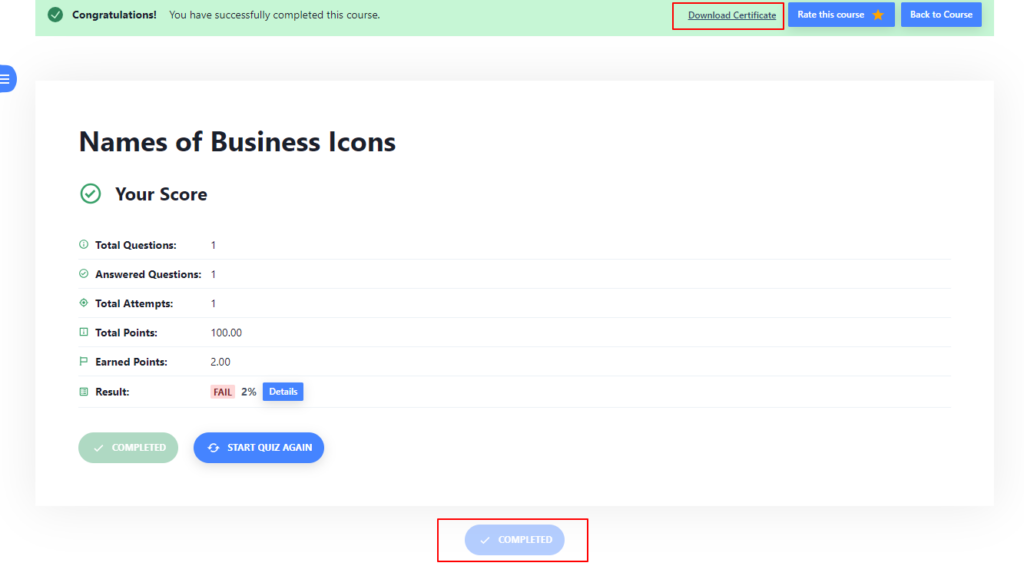
The student can then click this button to download their course certificate directly.
Design Tips for Creating Certificates
Creating a certificate is an essential aspect of solidifying your e-learning platform’s credibility and offering a tangible reward for your learners’ achievements.
Here are some design tips to consider when creating certificates for your Learning Management System (LMS) website.
- Utilize a Clean Layout: Ensure the design is not cluttered, enabling the recipient and others to quickly identify key information such as the course name and completion status.
- Ample White Space: Ensure that your design allows for enough white space to avoid visual clutter and to highlight key information effectively.
- Incorporate Branding Element: Include your logo, brand colors, and custom fonts to make the certificate align with your brand identity. This promotes recognition.
- Highlight Key Text: Make the certificate title, recipient name, and other important text stand out. Use larger fonts, bolding, color, etc., to draw attention.
Wrapping It Up!
Implementing proficient certificates for your LMS courses remarkably adds value for your learners while promoting course completion.
Essential steps involve planning the design, creating the template, and configuring the certificate generation settings. Following certificate best practices around branding, features, and visibility rules will ensure an effective certificate program.
As a closing reminder, it’s important to align certificate designs with your overall brand image and educational offerings.
By taking the time to create certificate templates that look impressive yet remain on-brand, you can increase enrollment, engagement, and learner satisfaction over the long term.
We have reached the conclusion of this article, and we hope it has provided you with valuable insights!
For further resources, we invite you to delve into our comparison article of Masteriyo vs. LearnPress.
Also, if you like our article, feel free to share it on your social networks.
Lastly, stay updated with our future insights by following us on social platforms like Twitter and Facebook.






![Zakra 3.0 | Zakra Pro 2.0 Release [Major Updates!]](https://i.ytimg.com/vi/g3rifl7kWvg/maxresdefault.jpg)