
If you own an online store, you must be familiar with WooCommerce. Over 5 million store owners use this platform to sell online goods and services.
But did you know you can market and sell courses with WooCommerce? The versatility of this platform allows the expansion of your store beyond physical goods and products.
WooCommerce has all the tools you need to get an online store up and running, from front-end shop templates to integrated payment gateways.
All you need to do is add a learning management system plugin to your WordPress website.
What is a Learning Management System (LMS)?
If you aren’t familiar with the term already, learning management systems are platforms for creating, distributing, and managing online courses and training modules. It benefits institutions and educators as WooCommerce does to shop owners and marketers.
LMS provides tools to create courses and the marketplace to sell them. It also has built-in mechanisms to track orders and multiple payment gateways to receive course enrollment fees.
LMS also brings an advanced interface for students and trainees enrolled in a course.
The need for LMS – WooCommerce Integration
For small-scale businesses, the built-in order system of the LMS plugin can be enough. However, if you already run a WooCoommerce platform, you can use its global marketing and payment processing to scale your operation and reach a wider audience.
If you are into content creation, you can use this LMS-WooCommerce combination to sell your content and merchandise from the same platform.
The integration makes more sense since WooCommerce is more popular and recognized. You can use the WooCommerce dashboard and associated tools for your elearning platform.
Just pick an LMS plugin you feel comfortable with and sell your online courses with WooCoomerce side by side.
Which is the best WooCommerce LMS to use?
If you don’t have a particular plugin in mind, we recommend Masteriyo LMS . We will be using this LMS plugin in this tutorial moving forward.
Not only is this easy to use, but you can also get started for free. It is fully compatible with WooCommerce and doesn’t need any third-party plugins.
Moreover, Masteriyo simplifies the whole process of adding WooCommerce to an elearning website. You just have to toggle a switch, and it’s done.
Here’re the features of Masteriyo that make it great for working with an ecommerce site:
- Fully compatible with WooCommerce
- Easy integration – no need for a third-party plugin
- Automatic enrollment at checkout
- Separate WooCommerce dashboard
Step-by-Step Guide to Sell Courses with WooCommerce
Before we start the guide, we are going to make a few assumptions:
- You run a WooCommerce store or have knowledge of it
- You want to sell courses on your WooCommerce store
In case you don’t know about WooCommerce and just want to create an elearning website, this article will be more beneficial to you: How to Start an Online Course Business in 2024.
With that out of the way, here’s how you can use your WooCommerce store to sell courses online:
Step 1: Install and Activate Masteriyo LMS
We are going to start by setting up Masteriyo. To do this, log into your WordPress Dashboard and head to Plugins >> Add New Plugin.

It will open the Add Plugins screen. Use the search bar on the top right to look for Masteriyo.
Once you find it, Install and Activate the plugin.

It will start the Setup Wizard.
General
In the General tab, select the color that best reflects your brand.
The Enable Instructor Registration Page is enabled by default. It allows other instructors to sign up and create their own courses on your platform.
If you don’t want to run a course marketplace, turn it off.
You can leave the rest of the options as they are.

Course
By default, Masteriyo creates a page listing all published courses. You can change the layout of this page in the Course tab.
Here, you can choose between Grid and List views, limit the number of courses per view and page, and opt for a search bar.

Business Type
The next tab is pretty straightforward. Select “Individual” if you want to be the sole educator, or go with “Marketplace” if you want an elearning platform where anyone can sign up as an educator.

Checkout
The first row in the Checkout tab allows you to select the currency in which you want to sell your courses. In the next row, choose where you want the currency sign to be relative to the amount.
For example, if you choose US Dollar ($) and Left, the price will be displayed as $99.99.
For example, if you choose US Dollar ($) and Right, the price will be displayed as 99.99$.

Sample Courses
Masteriyo also has some prebuilt courses that you can publish during the setup. It can come in handy if you don’t have prior experience of using an LMS and want some reference to create your first course.
You can also choose to keep the demo courses on draft and publish or delete them later.

Finish
Congrats! You’ve successfully set up your learning management system. You can now create and sell courses right away.
Get right into it by selecting the “Create a new course” button.

Step 2: Create your first Course
It will take you to a new interface where you can input the course’s name, description, and highlight. Assign a relevant category and a featured image before you hit the “Next” button.

Use sections to create a basic outline of the course in the Course Builder. Add lessons to the sections and finish by including a quiz or an assignment at the end.

In order to make the course visible to the WooCommerce plugin, you need to set a price for the course. You can do this from the Pricing tab in Settings.

If you want a detailed guide, you can check out our comprehensive article on course creation using Masteriyo.
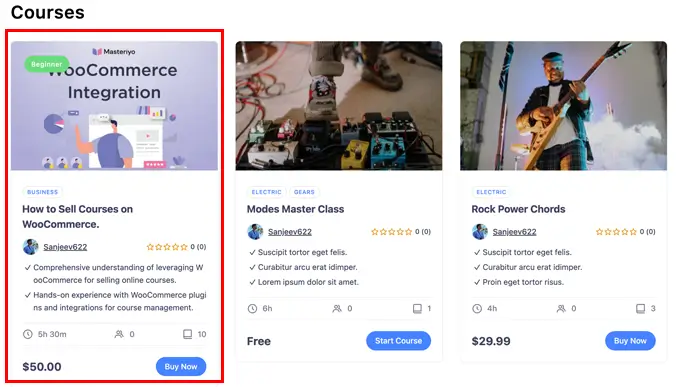
After you hit the “Publish” button, the course will show up on the Masteriyo Courses page, from where students and learners can sign up.
Step 3: Active WooCommerce Addon for Masteriyo
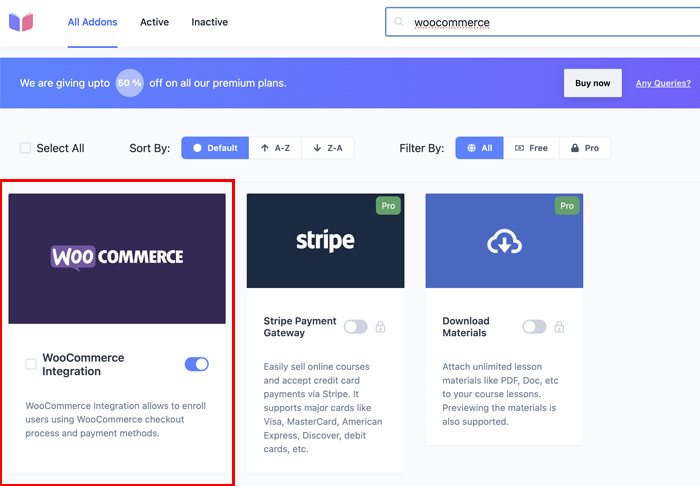
It is probably the easiest part of this tutorial. Starting from the WordPress Dashboard, go to Masteriyo and then to Addons. You will find it highlighted toward the end of the list.
Search for the WooCommerce Integration and click on the toggle to its right. Once enabled, the switch will turn blue.
Note: You need to have active WooCommerce plugin on your site before you enable the integration.
Congrats! You can now access courses created using Masteriyo LMS from your WooCommerce platform.
Let’s see how it’s done.
Step 4: Create a WooCommerce Product for your Course
Creating a Course-type WooCommerce product isn’t any different than creating other standard products.
Go to Products from the dashboard and click the “Add New” button on the top right.

It’ll take you to the Edit Product section, where you can give the course product the name, description, and categories.
Don’t forget to add a relevant product image. You can even create a photo gallery if you want to.

In the Product data drop-down menu, select Masteriyo Course.

Then, assign the regular price of the course.

Then, hit the Publish button. It will publish the course as a product.

Users will be directly enrolled after they buy the course from the WooCommerce store.
Step 5: Manage Enrollment and Subscription
You can choose what happens with the enrollment when the payment is unsuccessful. The control is accessible from the new Integration tab on the Masteriyo Settings page.
By default, enrollment is revoked if the payment fails, gets canceled, or is refunded. You can also do this for payments that are pending or on hold.

The course will then appear on your WooCoomerce store.

Users can add the course to the cart before finally checking out to confirm their purchase. The process is similar to how one would buy other products through WooCommerce.


Wrapping up How to Sell Courses using WooCommerce
Selling courses online is even easier if you already have a working knowledge of WooCommerce. It takes care of all store infrastructure and payment processing.
Install a flexible LMS plugin like Masteriyo and focus on course creation. Masteriyo has all the features you need, and it comes with WooCommerce support.
I hope you found this article on LMS—Masteriyo helpful. Use the comments section below to let us know if you have any queries.
Don’t forget to share this article with your peers.
Video Tutorial: How to Sell Courses with WooCommerce
If you prefer watching a video tutorial for this, you can find it here.
Frequently Asked Questions
Yes, you can sell courses using the ecommerce platform and payment gateways of WooCommerce by integrating it within an LMS plugin.
The WooCommerce Integration addon for Masteriyo is available for free.
You can easily integrate WooCommerce with Masteriyo by using the corresponding addon.
The WooCommerce Integration addon for Masteriyo is available for free.
Yes. Courses created with Masteriyo LMS can get all the benefits of WooCommerce products.


![Zakra 3.0 | Zakra Pro 2.0 Release [Major Updates!]](https://i.ytimg.com/vi/g3rifl7kWvg/maxresdefault.jpg)