
Struggling to keep track of your team members’ training and performance? Training Management System (TMS) is what you need.
Previously, you would have had to rely on third-party solutions to manage all the in-house training and skills development.
However, you can now create a training management system tailored to your needs using WordPress and associated tools and plugins.
This article is all about that, so let’s get started.
What is a Training Management System (TMS), and Who is it for?
Training Management System is a platform used by organizations to manage and control in-house activities related to the skill and personality development of members.
It is used to streamline and automate everything that goes into planning, creating, delivering, and tracking the effectiveness of training.
Training Management Systems have been essential to organizations, offering a centralized platform for managing all in-house training and workshops.
However, you can now find them used prominently by training companies and professional tutors. A TMS offers various tools to manage training materials within your platform.
You can use it to create, manage, and market your courses and services if you are an individual offering training, tutoring, or similar services.
Difference between LMS and TMS
Training management systems and learning management systems (LMS) are often used interchangeably. However, there are some key differences that you should be aware of. It will help you decide the ideal solution for your needs.
Learning Management System, by definition, is a platform where you can create and host online courses for your learners. It is mainly used by educational institutions. There is not much scope for back-office operations.

On the other hand, the training management system focuses more on administrative tasks like planning, management, and analytics. It’s basically an LMS but with backend features integrated.
Unlike LMS, where users can learn at their own pace, modules on TMS are instructor-led and often pre-scheduled. It allows for a hybrid experience incorporating elearning and classroom-based learning.
Top 5 Reasons to Choose a TMS
You might be wondering why training management systems are popular among companies. It’s because TMS forms the backbone of their hiring, onboarding, and training process.
Here’re the key features highlighting the importance of TMS:
1. Streamlines Training Process
With training management software, companies can streamline the process of employee training and skill development. This helps large organizations carry out training efficiently.
2. Automation
Training Management System removes the need for manual action in administration tasks. Most day-to-day tasks are automated, saving time, effort, and money.
3. Performance Tracking and Analytics
You can track the performance of employees and trainees across multiple modules. This helps companies get to know their true capability and potential.
Stakeholders can use this data to plan updates for existing modules or create new ones.
4. Cost Efficiency
While employee training software can seem costly during the initial installation, it will cut administrative and operational costs down the road, making the process cost-efficient in the long run.
5. Certification
When a trainee completes a module, TMS provides a certificate for proof. Some systems even offer additional mechanisms to validate the certification.
This adds credibility to your training and also motivates the learner.
How much does a TMS Cost?
The cost of installing a TMS varies according to the platform you choose. You can find premade solutions in the market, but they might not have all the features you need. Sometimes, you might be paying for features you don’t need.
On the other hand, building a training management system from the ground up is costly and requires a lot of time and effort.
Thus, we recommend platforms like Masteriyo that are modular and cost-effective. With Masteriyo, you can build a training management system tailored to your needs, own it, and even scale in the future at a minimal annual fee.
Key Features of Masteriyo as a TMS
Here’re the key features that make Masteriyo an excellent platform for building your company’s training management system:
1. White Label
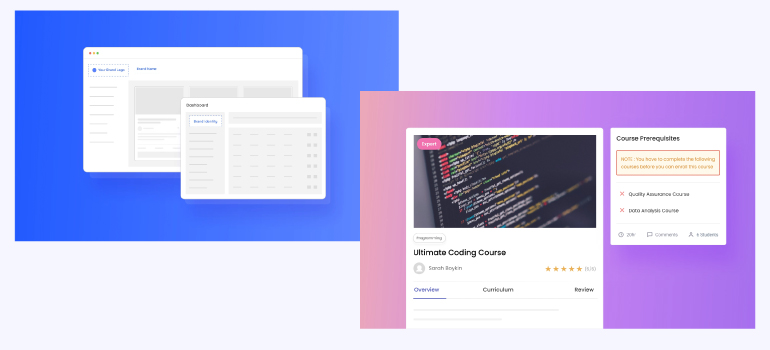
You can replace the Masteriyo name and logo with your own brand to make the training management platform truly yours. Furthermore, you can change the color scheme and arrange the menu options.
2. Security
Masteriyo has a suite of security measures in place to safeguard your and your users’ interests. You can enable email verification and a password strength checker for new signups.
Masteriyo also has two-factor authentication and Google reCAPTCHA to stop impersonators and bots from getting into your system.
Your course content is also protected — no one can copy or download it from the platform.
3. Distraction Free Learning Page
Modern websites have a lot of things going on in the frontend — from headers and footers to the sidebars. This can cause a distraction to the learners.
Thankfully, with Masteriyo, you can disable them to direct users’ attention to learning materials.
4. Bulk User Registration
It’s not always possible to manually add people to the training management system as the user base sometimes exceeds thousands.
As such, Masteriyo supports bulk import as well as export of trainers and trainees.
5. Data Backup
You can export the courses, quizzes, instructors, and learners as CSV files. These files can be stored locally as backups.
6. Course Visibility
Masteriyo gives you complete control over your course visibility. You can make the course exclusive to logged-in team members. This helps maintain confidentiality within our organization.
Moreover, you can make the course public if you want more exposure.
7. Enrollment Expiration
You can also set up an expiration for individual courses in Masteriyo. This motivates team members to finish the course quickly, making the learning process more effective.
8. Course Prerequisite
You can simplify the learning journey for your user by having beginner and mid-level courses as prerequisites for mid-level and advanced-level courses, respectively.
One course can have multiple prerequisites, and users will be notified of them when they try to enroll in a course.
This feature can guide learners through a roadmap for acquiring specific skills or taking up a designated role.
9. Content Drip
Sometimes, you might need to control the flow of the course. You can stop learners from jumping between lessons by implementing a content drip. This way, modules get unlocked sequentially, chronologically, or based on the days from enrollment.
10. Zoom Integration
Masteriyo can even host interactive virtual classrooms using Zoom. You can set the time and duration for the meeting, and students can join at the said time from the curriculum section.
11. Gradebook
Masteriyo’s internal evaluation system helps track and grade students’ assignments and quizzes. This feature can be used to track trainees’ performance in a training management system.
12. Additional Revenue Streams
Passive income is possible by offering select modules to the external audience for a one-time fee. You can opt for a subscription model for your training management system. This way, you can generate recurring revenue for your company.
How to Install Training Management System in 5 Easy Steps?
With all that out of the way, let’s start building your very first training management system.
For this tutorial, we will be using eLearning themes by ThemeGrill, and for some good reasons.
It is not just a theme — the Masteriyo integration makes it a complete learning management system in itself.
And it’s available for free. All you need to do is choose whether you want a site for an organization or an individual.
Now that we have decided on the theme and plugin for our platform let’s get building.
Step 1: Install the eLearning theme and Masteriyo plugin.
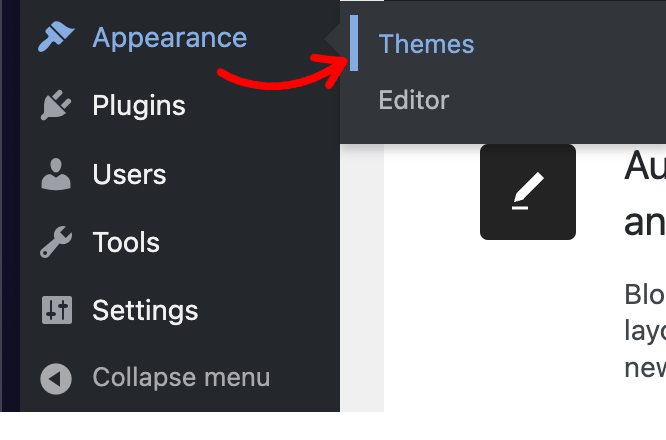
Log in to your WordPress Dashboard and head over to Appearance>>Theme>>Add New Theme.
Input “eLearning” into the search bar and hit “Install” to select the appropriate option.
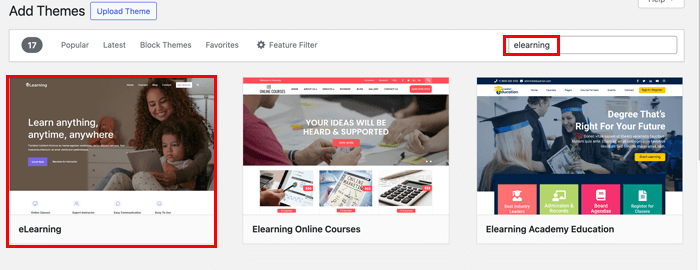
Once the installation is complete, hit the “Activate” button.


This will open the Theme Dashboard under the Appearance Menu. At the top, you will notice the welcome message from the eLearning theme.
Click on the corresponding button to enable ThemeGrill Demo Importer.

This will give you premade pages to work with. The main eLearning demo is perfect for organizations, such as corporate offices and online learning systems.
On the other hand, if you’re an individual offering professional training, the Tutor demo will be a better option.
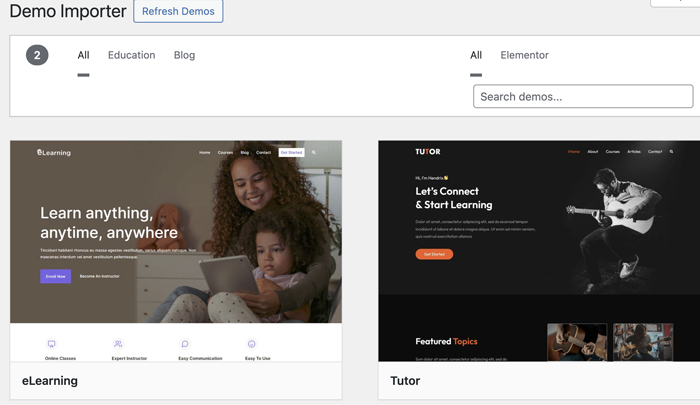
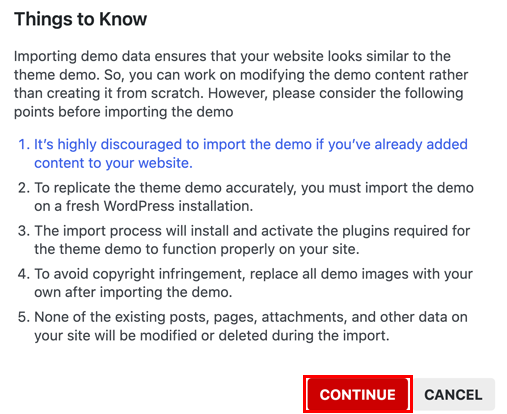
Choose the demo you like to initiate the import process. Click ‘Continue’ on the dialog box that appears next.
This will also install a basic learning management system powered by Masteriyo and Everest Forms.
If you want to use a theme other than eLearning, you will have to install these plugins separately.
To do this, head to Plugins >> Add New Plugin. Then, search, install, and activate the plugins individually.
Step 2: Configuring Masteriyo LMS
The next step is to set up the Masteriyo LMS properly.
Starting from the WordPress Dashboard, head to Masteriyo >> Settings.
The first thing to do is assign pages for your training management system. Fortunately, Masteriyo has everything covered — all the required pages come prebuilt along with the necessary styling.

The styling section lets you choose your brand color.
Furthermore, you can manage course access, registration for trainees, and your preferred course editor.
You can manage the layout of the course list, single course, learning, and account pages from their respective tabs.
Furthermore, there are tabs for configuring payments, quizzes, emails, and other technical settings.
Once you have made your changes, hit “Save Settings.”
Step 3: Creating your First Training Module
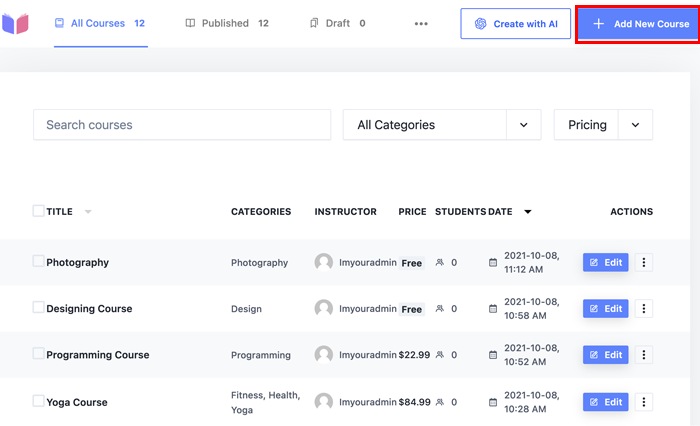
You can now create your own training module. Head to Masteriyo>>Courses and select the Add New Course option from the top left position.
Start by giving your module a name. Then, add a detailed description as well as a brief highlight section. You can also add a feature image that reflects your course.
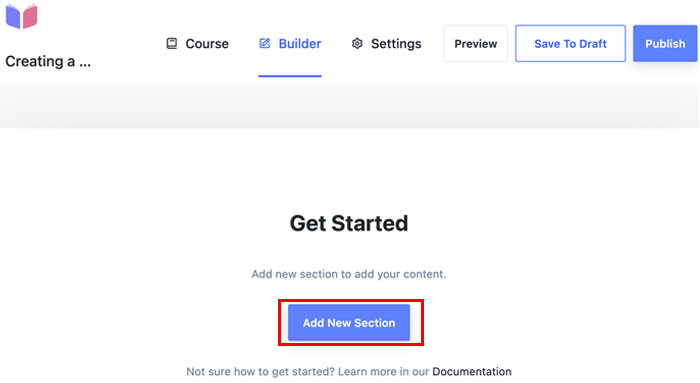
Finally, assign a relevant category to the module and move on to the Builder Section.

Here is where you add the actual content or training material.
Start by creating sections. You can use them to create a general outline of your course and training module
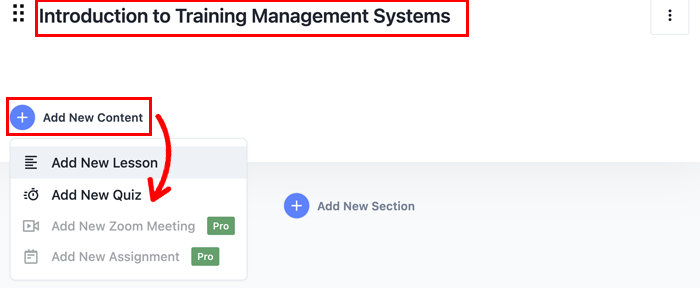
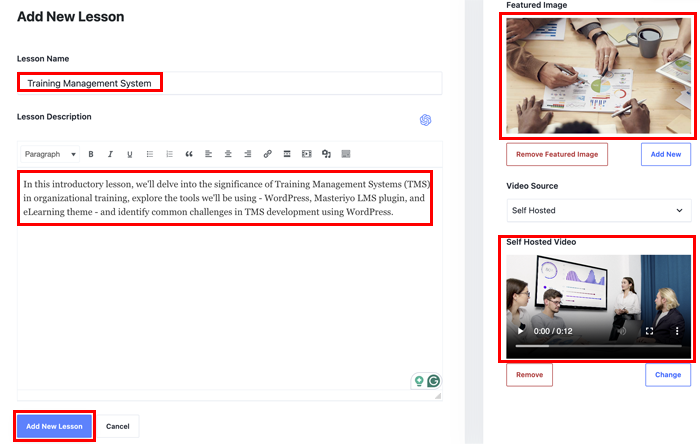
To add a lesson to a section, click on the Add New Content button and select Add New Lesson.
Give the lesson an appropriate title and description. Then, add your video lesson by selecting Self Hosted on the Video Source and uploading the video to the next section.
You can even add a featured image for the lesson.
Masteriyo also allows you to add videos posted on platforms like YouTube and Vimeo to your lesson.
Finish up by hitting the “Add New Lesson” button. Save the progress by selecting “Save to Draft” on the top right.
Adding a Quizz
You can even add quizzes to your section. Just select “Add New Quiz” from the “Add New Content” drop-down list.
Give a name to your quiz and select “Add New Quiz” to move to the Questions department.

Select the “Add New Question“, which will then open a new interface. Lay down your question on the Question Name, then select the question type.
Masteriyo currently has 9 supported question types, including true/false, single-choice, multiple-choice, and text answers. So you don’t feel limited.
Add the question in the section below and mark the correct answer by ticking the box on the right. You can even copy and delete answers using the corresponding suitable icons.
Complete the quiz using the “Update” button.

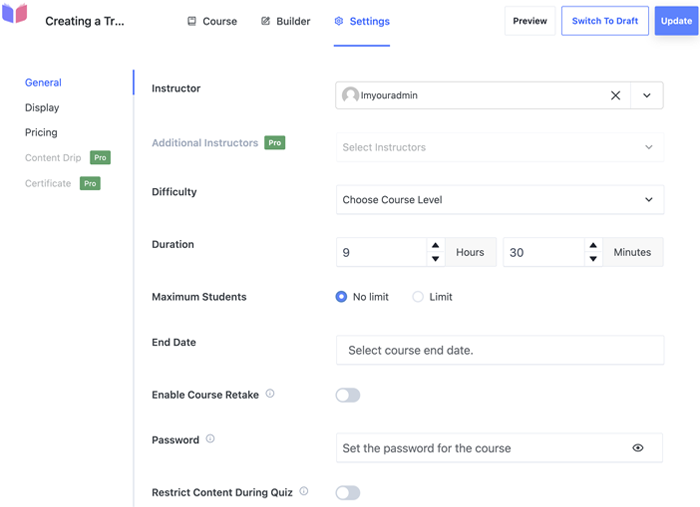
Training Module Settings
After you have added all the necessary materials, the only remaining thing is to set the module’s settings.
You can specify instructors, difficulty level, and course duration from the General settings. Here, you’ll also find the option to limit training enrollment, mark the end date, and allow retakes.
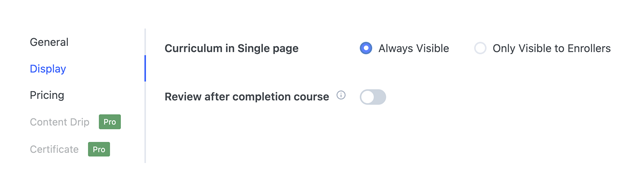
If you want the curriculum accessible only to enrollers, you can do this from the Display settings.
The Pricing section lets you set a one-time enrollment fee. This is especially helpful for corporate training companies and professional trainers.
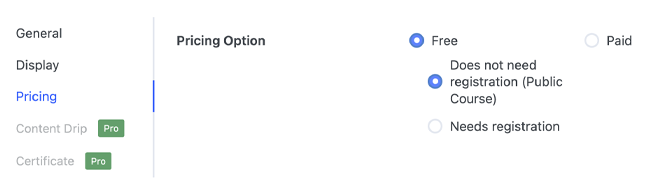
Even in a company setting, you can include external courses with premium pricing for interested employees.
However, you’d want to make training available for free for an employee training system. You can do that here as well.
Finally, you can create a deadline for course completion using the course expiration feature.
Step 4: Add Trainers and Trainees to your Training Management System
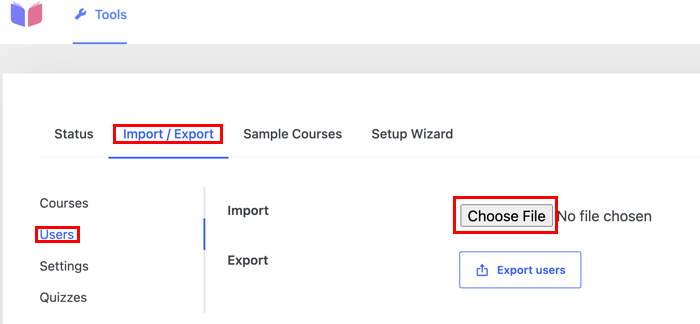
Now, you can add members to your training management system. Masteriyo allows you to import trainers and trainees in bulk using a CSV file.
To accomplish this, go to Masteriyo >> Tools >> Import/Export and click on Users. In the Import section, select the CSV file containing
Thus, corporate offices can add employees and instructors in one go.
Moreover, you can enable individual registration for both learners and educators. This option is for professional trainers and training companies.
Step 5: Integrate other features based on your requirement
Congratulations, you now have a training management system with training modules, trainers, and trainees.
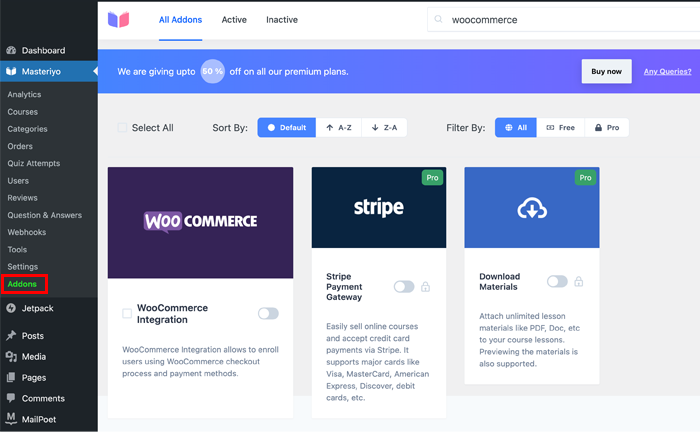
You can integrate other features based on your requirements. Go to Masteriyo >> Addons and enable the toggle beside the features you want to add.
Wrapping Up Our Ultimate Training Management System Guide!
To conclude, the training management system is vital for organizations to train and track their employees’ progress. It also streamlines administrative tasks that go into training and onboarding processes.
There are a lot of options when it comes to training management systems, from premade to custom-made solutions. However, we recommend going with LMS like Masteriyo because of their flexibility and cost-effectiveness.
You can install a training management system in five easy steps and customize it with features you like. We also have an article on using LMS platforms for corporate training if you want help getting started.
Do you use a training management system in your organization? Do share your experience if you do.
Also, don’t forget to share this article with your peers if you found it helpful.


![Zakra 3.0 | Zakra Pro 2.0 Release [Major Updates!]](https://i.ytimg.com/vi/g3rifl7kWvg/maxresdefault.jpg)